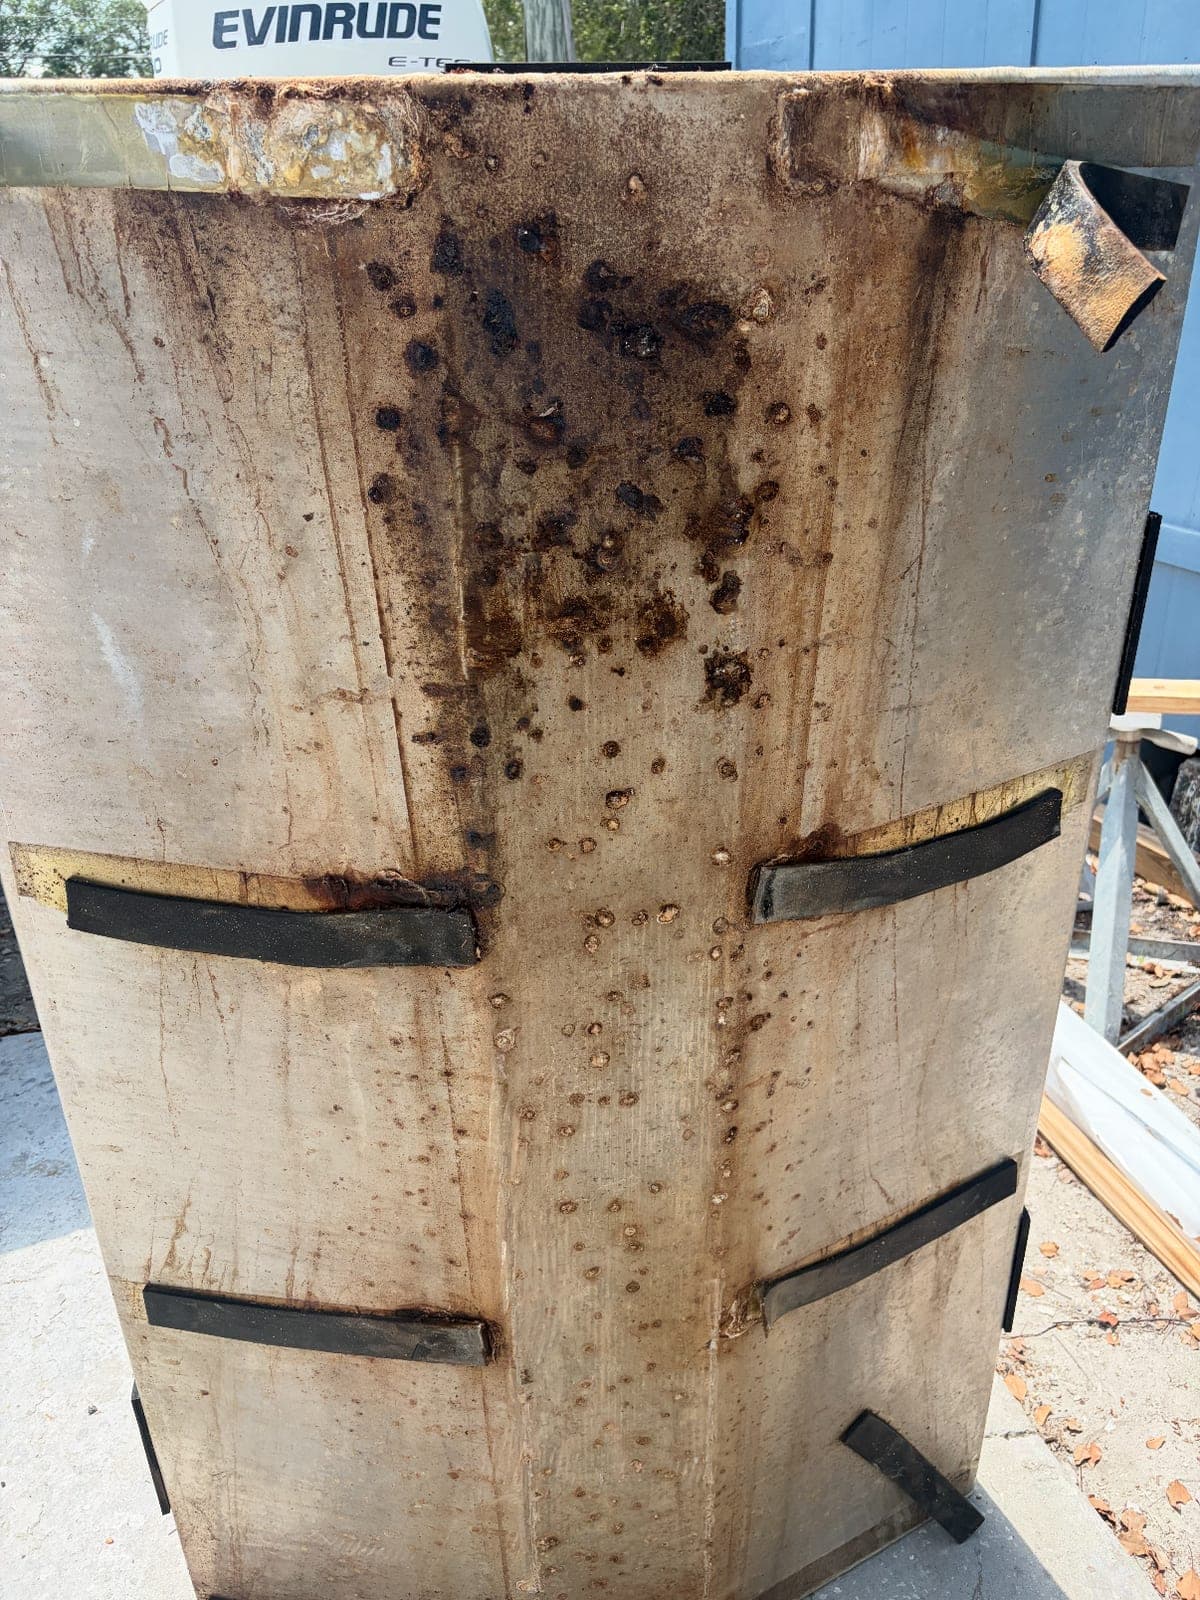
A fuel tank can fail because of age, water, corrosion, or damage. On this Boston Whaler 305, the cause was much smaller than the repair it created: a stainless steel screw left in place during construction had compromised the center aluminum fuel tank.
The tank sat below finished cabin and cockpit structure. There was no service hatch large enough to lift it through, so replacing it meant carefully opening the boat, removing the damaged tank, installing a custom replacement, and restoring everything around it.
This case study is based on the completed service record. The customer has been kept anonymous, and the story focuses on the problem, the decisions made during the repair, and what boat owners can learn from it.
The Failure Was Hidden Below the Finished Boat
The original center tank showed extensive exterior pitting and corrosion. The critical finding, however, was not simply that an older aluminum tank had deteriorated. The service record traced the damage to contact with a stainless steel screw left from construction.
From the owner's perspective, this was almost impossible to see. The affected area lived below finished surfaces, where a normal-looking cabin and deck offered no view of the tank, nearby fasteners, trapped moisture, or supporting structure.
That is what makes hidden fuel-system problems so deceptive. A small symptom above the deck can point to a much larger condition below it, and the only way to understand the repair is to reach the component safely and inspect it directly.
How One Small Fastener Created a Major Problem
Stainless steel and aluminum behave differently in a wet marine environment. When the two remain in contact and moisture is present, the aluminum can corrode preferentially. A misplaced screw can also create a direct pressure point and a place for moisture to remain trapped.
This does not mean every stainless fastener near an aluminum tank will cause a failure. Separation, coating, drainage, ventilation, and the exact point of contact all matter. On this boat, the finding was specific: the screw had been left where it could compromise the center tank.
The broader lesson is that a fuel tank's service life depends on more than the tank material. The surrounding installation matters just as much—what touches the tank, how it is supported, and whether the compartment can stay dry.
Reaching the Tank Was the Hardest Part
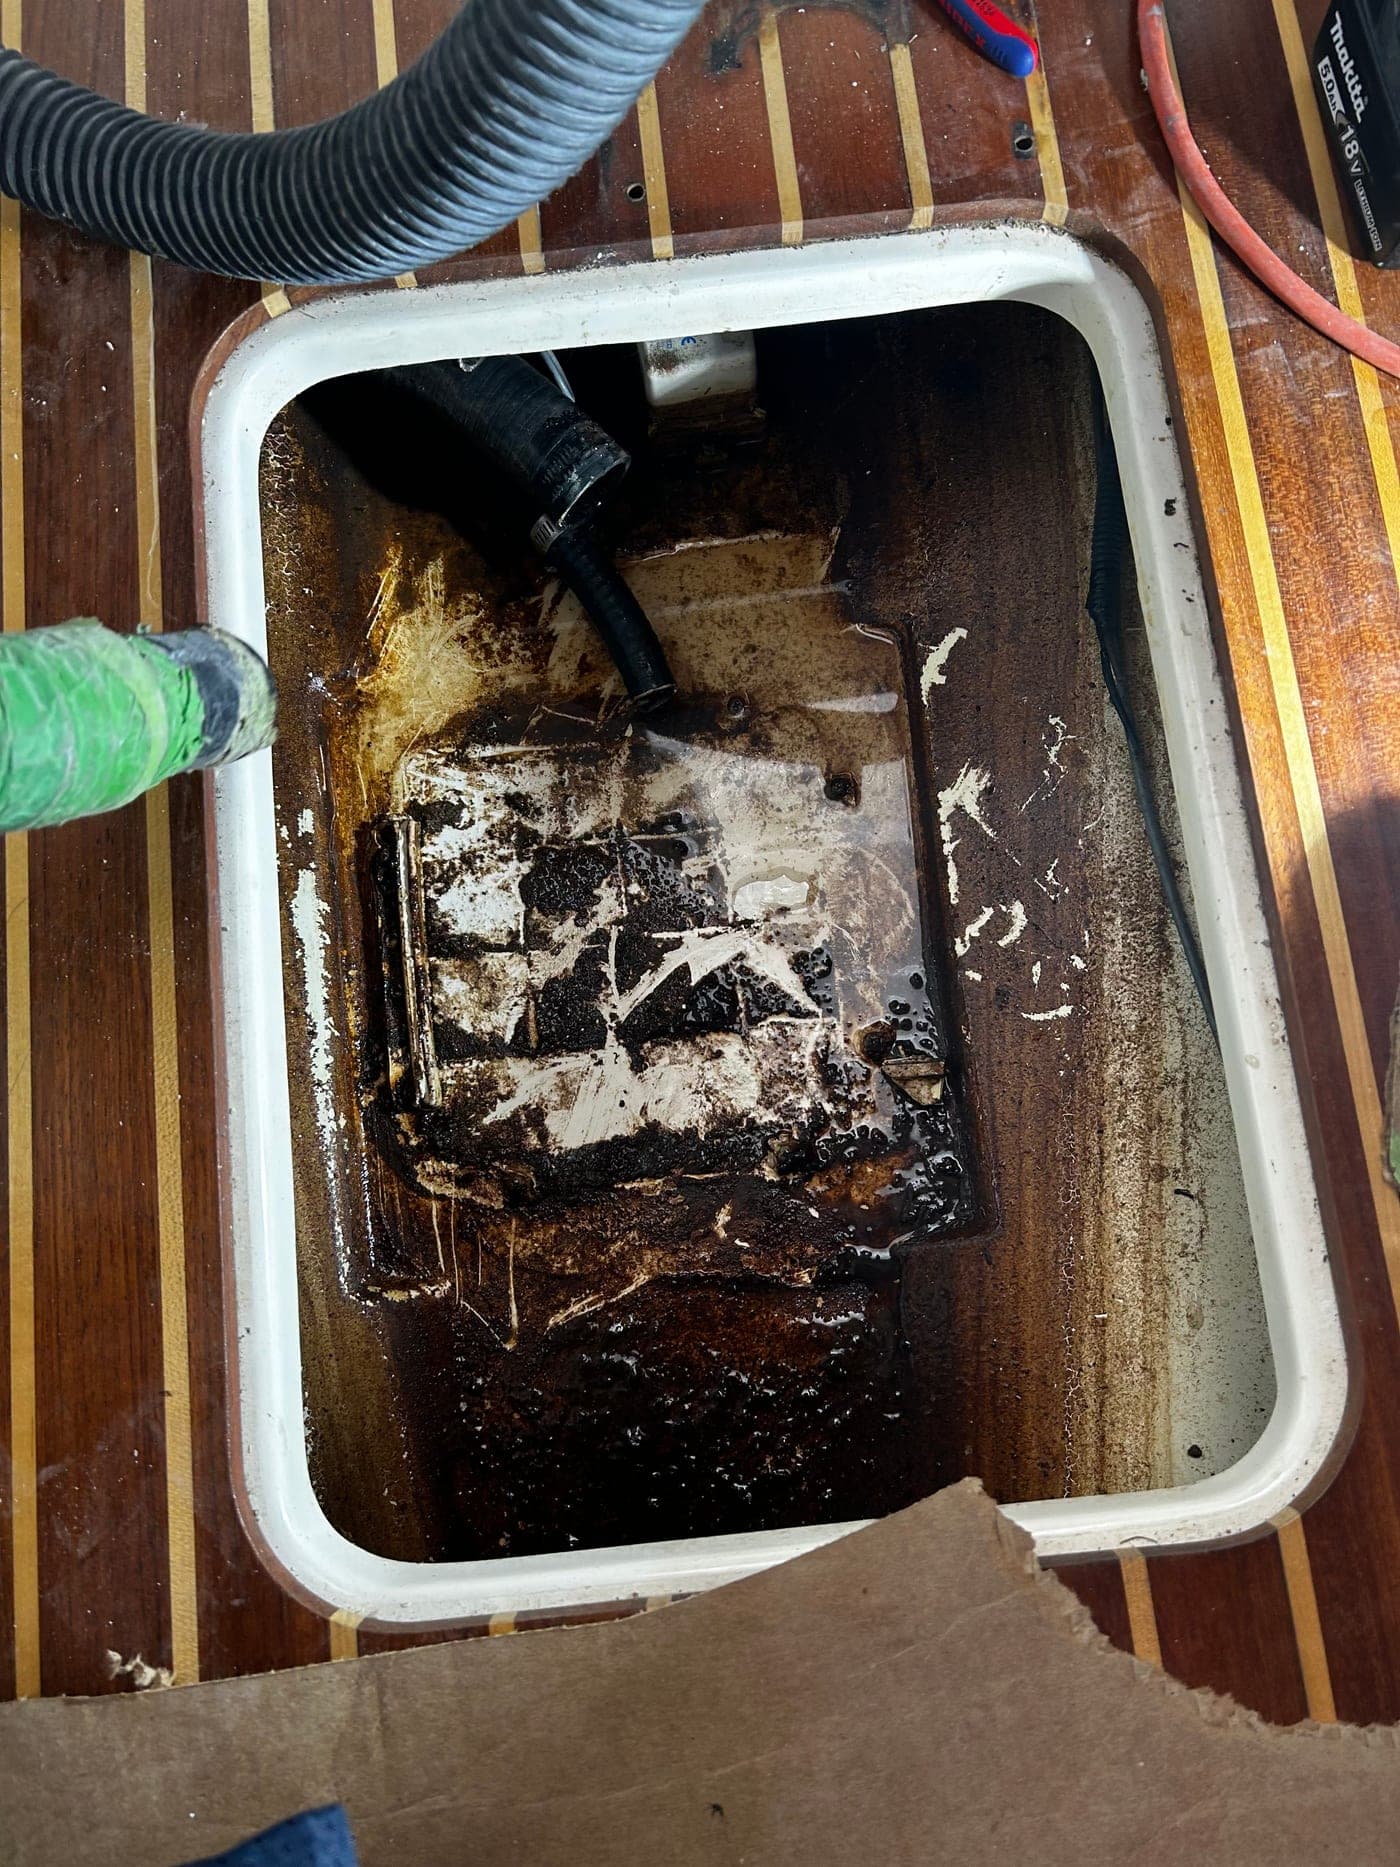
This was not a tank that could be pulled through an existing hatch. Built-in cabin components and the center floor structure stood above it. The interior had to be disassembled methodically, the fuel system made safe, and the access area opened before the damaged tank could be removed.
That access work required care because the same boat had to go back together after the mechanical repair. Interior pieces, wiring, plumbing, panels, and finishes could not simply be treated as demolition debris. They had to be removed in a way that protected what would be reused and preserved a clear path for restoration.
Once the tank was out, the exterior damage that had been hidden below the floor could finally be seen and evaluated directly.
Replacing the Tank Instead of Trying to Save It
The owner asked an important question: could the damaged tank be repaired, or did it need to be replaced? Based on its condition, the decision was to replace it.
The original tank was used as the pattern for a custom coated aluminum replacement. That allowed the fabricator to reproduce the dimensions and connection locations needed for the Boston Whaler's existing space rather than trying to adapt a generic tank to a highly specific installation.
The new tank still had to fit the boat as a complete system. Fill and vent locations, fuel feeds, sender access, mounting, clearance, and isolation from surrounding hardware all had to work together. The goal was not just to install a new container; it was to avoid recreating the conditions that damaged the original one.
Using Open Access to Renew the Fuel System
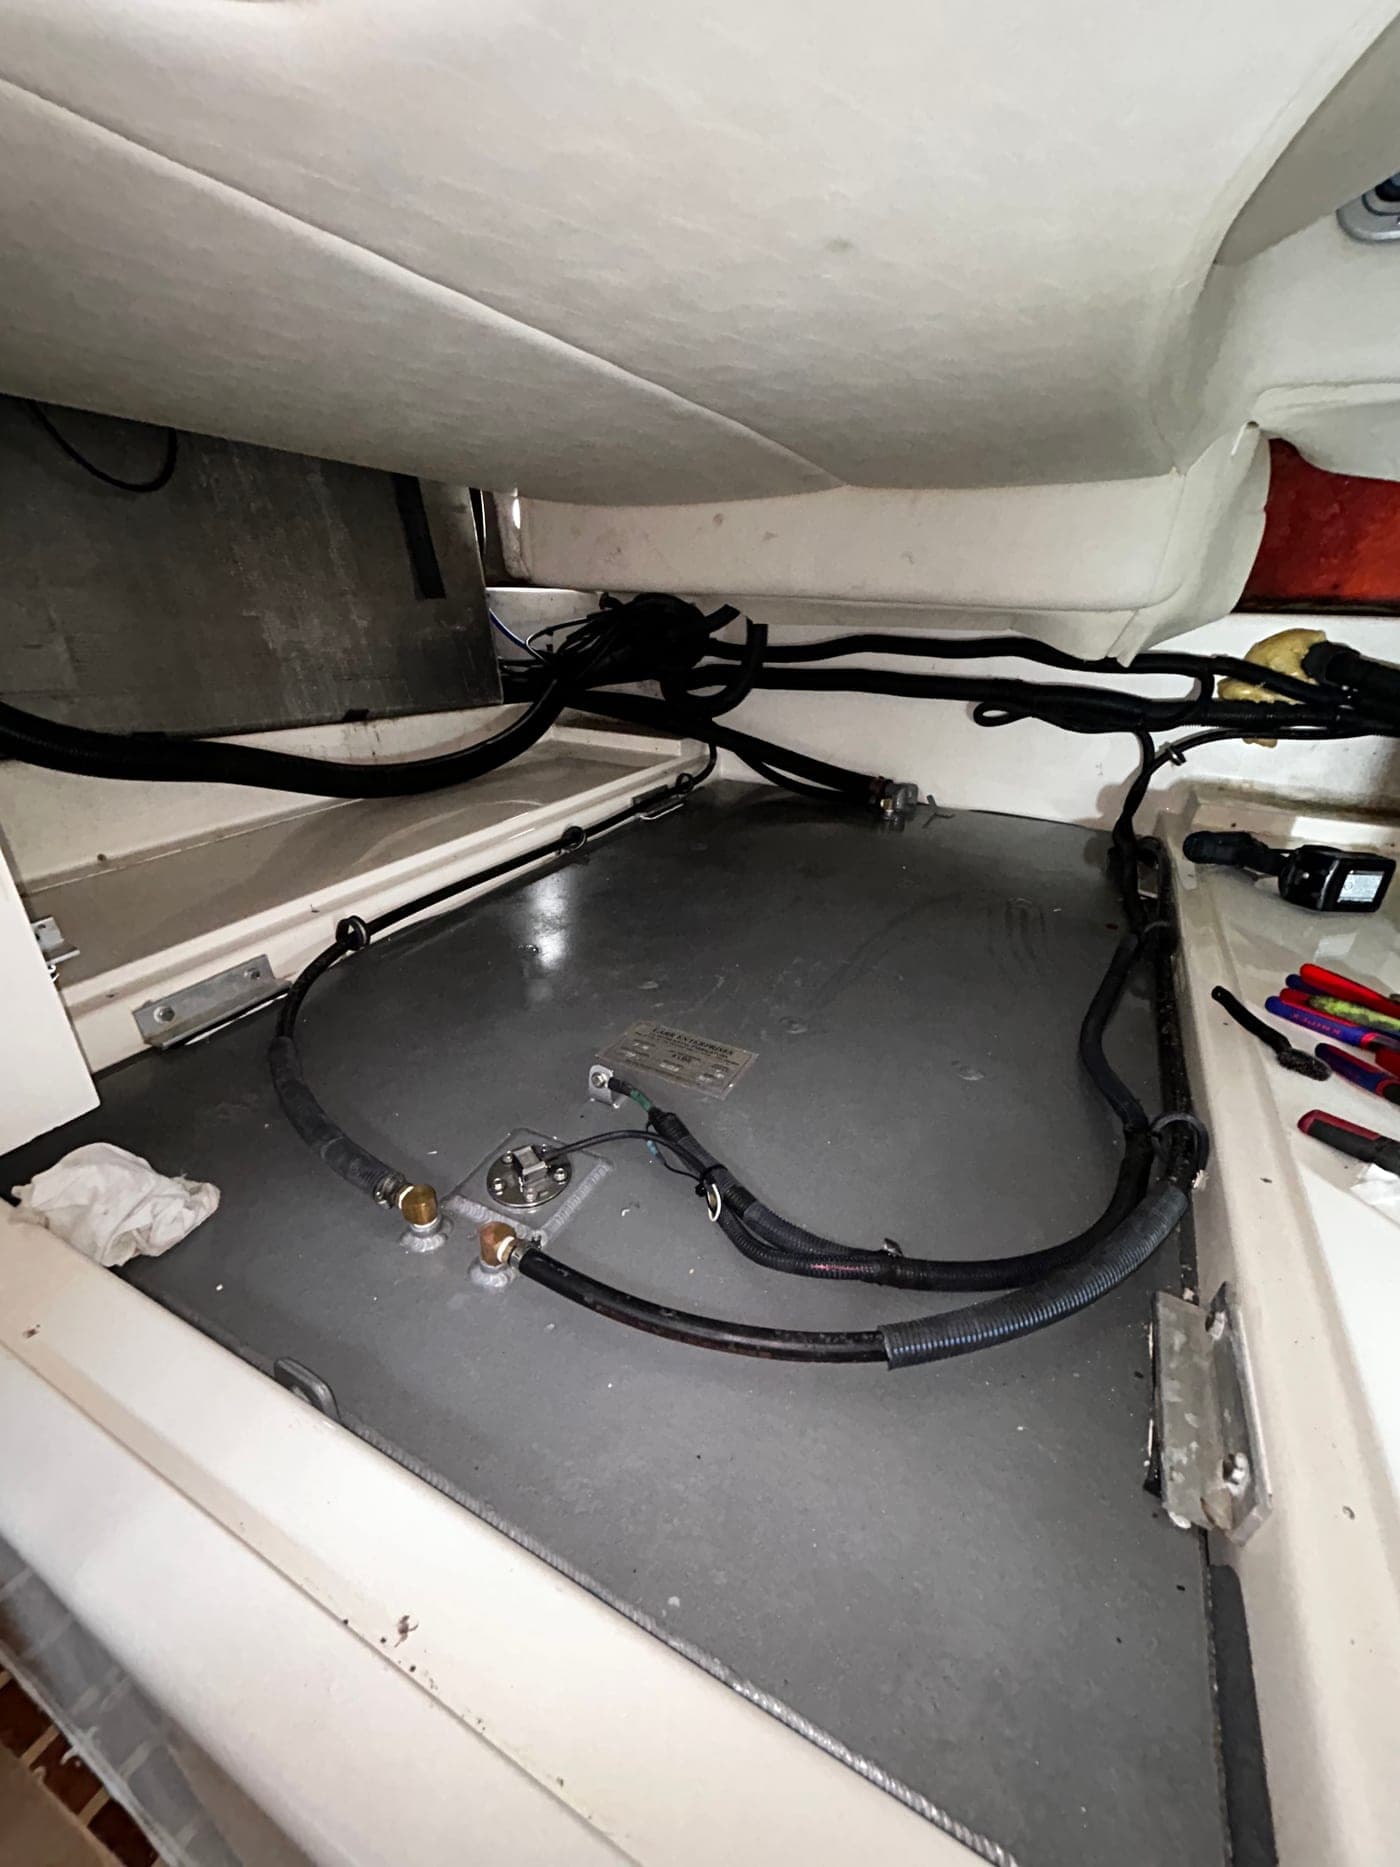
Removing the tank also exposed hoses and connections that would become difficult to reach again after the floor was rebuilt. Rather than burying aging components beneath a new tank and restored interior, the associated fuel and vent lines were renewed while access was open.
This is one of the most practical lessons from a repair like this. When a major component is already out, the surrounding buried items should be evaluated before the boat is closed. Replacing a questionable hose or connection at that point is far more sensible than reopening the same finished structure later.
With the new tank installed, the fill, vent, feeds, sender, wiring, mounting, and supporting hardware were brought back together as one renewed center fuel system.
Rebuilding the Boat Was Part of the Repair
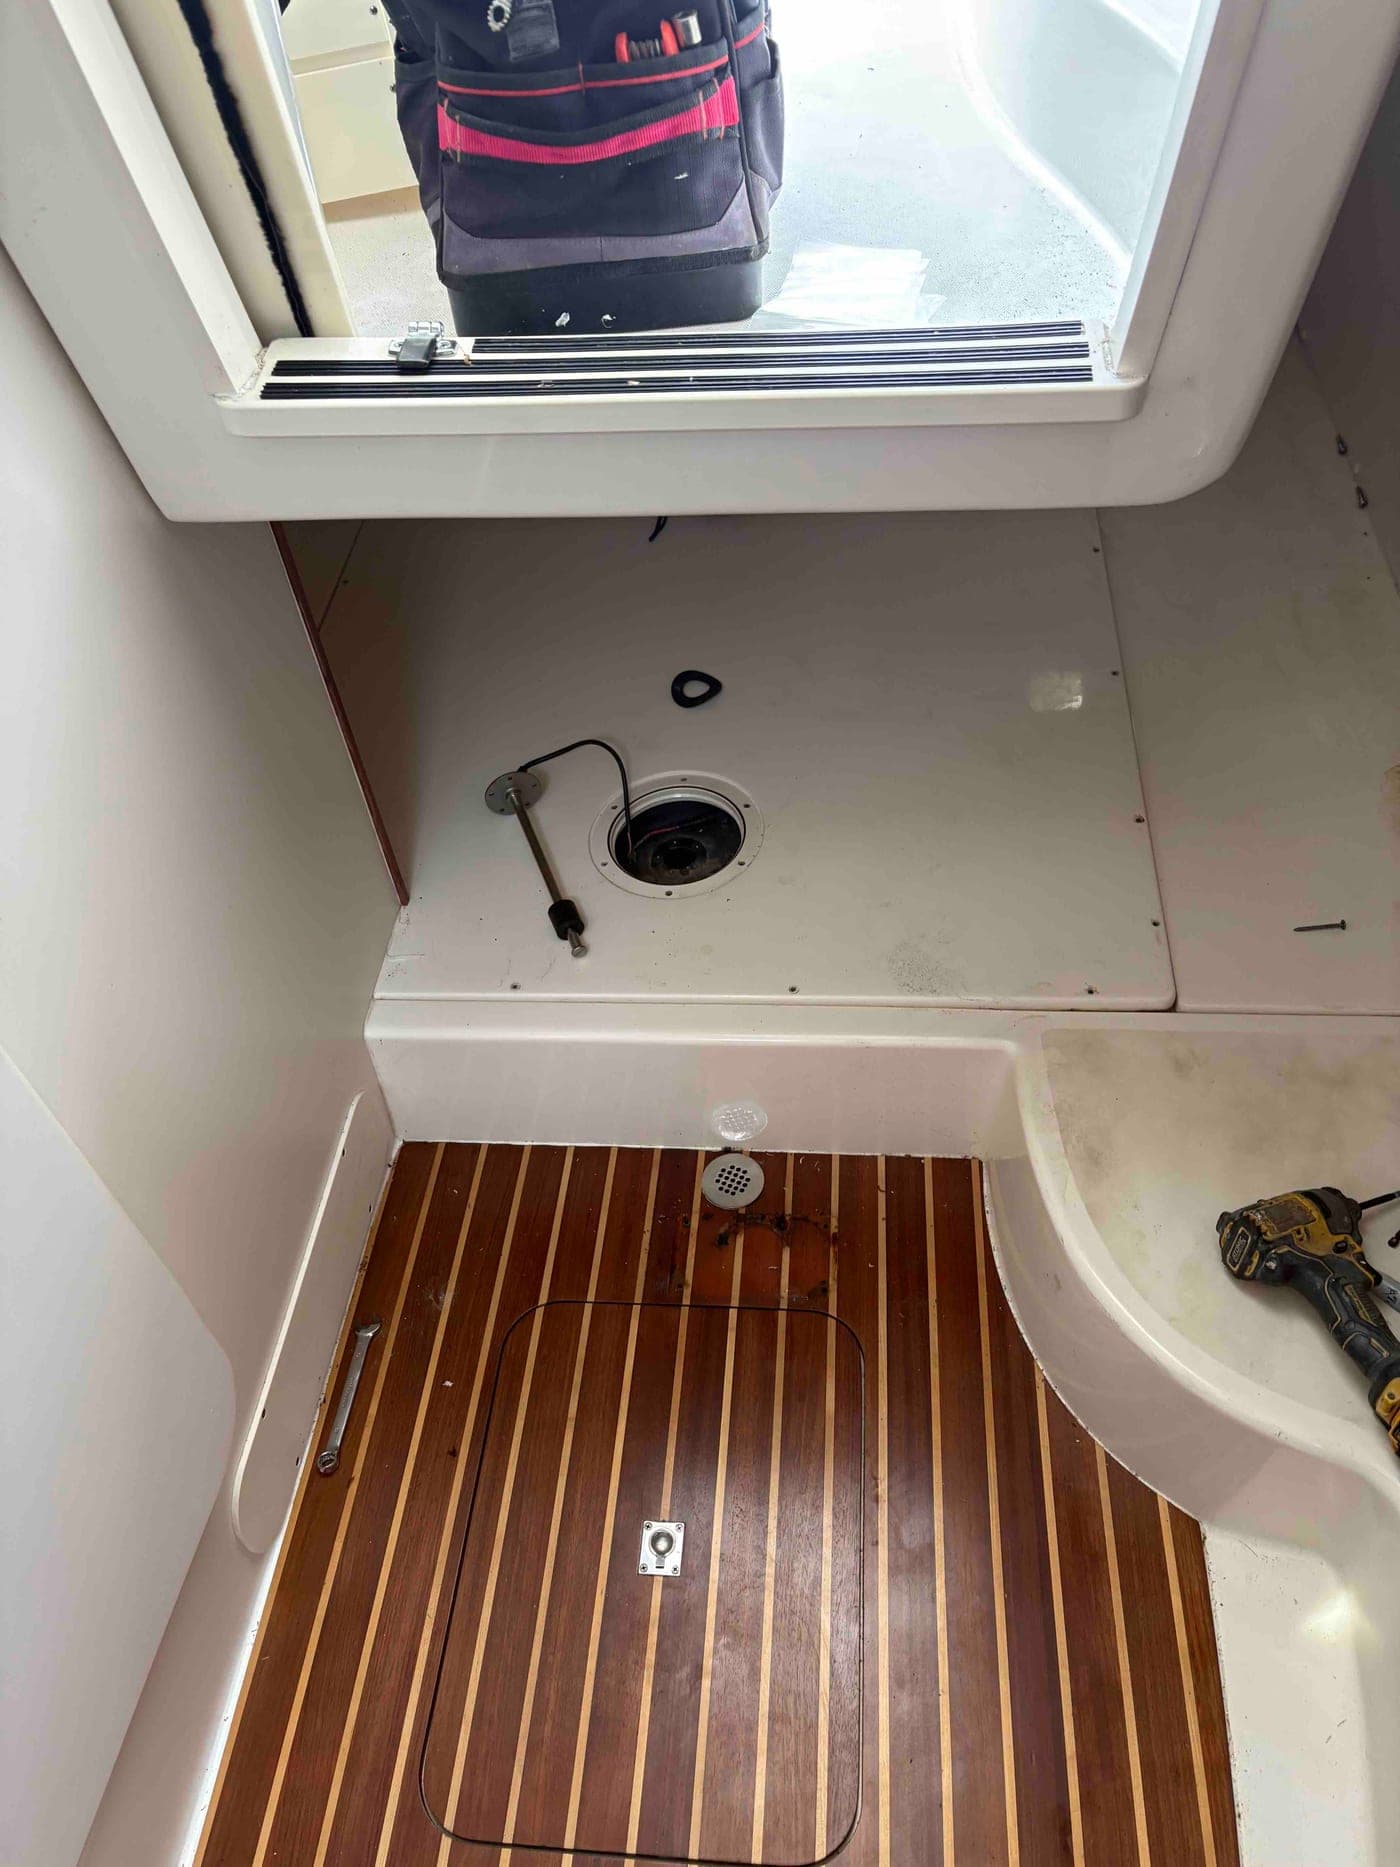
Installing the tank was not the finish line. The opened floor and cabin structure had to be rebuilt, sealed, and returned to a complete, usable condition.
That restoration matters mechanically as well as cosmetically. A poorly finished access area can introduce water, movement, noise, or future service problems even when the tank itself is sound. The rebuilt area needed to protect the installation while preserving the intended service access.
The final step was to put the fuel system back into operation and observe it as a complete assembly. A tank can look correct while empty; final verification confirms that the fill, vent, sender, feeds, and surrounding connections function together after the boat has been restored.
What Boat Owners Can Learn From This Repair
This Boston Whaler project offers several useful takeaways:
- Small installation details can create large repairs. One misplaced fastener damaged a component buried below finished structure.
- Tank condition cannot always be judged from above. Exterior corrosion often develops where an owner cannot see it.
- Access can be a bigger challenge than the replacement itself. The boat must be opened and restored without creating new problems.
- Open access is an opportunity. Buried hoses and connections should be evaluated before they disappear beneath a rebuilt floor.
- A custom tank is part of a system. Fit, mounting, isolation, hose routing, sender access, and surrounding structure all affect the result.
- Complex repairs need continuity. Disassembly, fabrication, mechanical installation, and restoration have to stay connected from diagnosis through verification.
Signs That Justify a Fuel-Tank Inspection
The following are general warning signs—not symptoms we are attributing to this particular boat. Any one of them is worth investigating:
- A persistent gasoline odor, especially after fueling
- Unexplained fuel loss or a fuel-gauge reading that changes faster than expected
- Fuel sheen, staining, or liquid in the bilge or tank compartment
- Heavy corrosion visible through an inspection opening
- Damp foam, trapped water, or debris around the tank
- Cracked, hardened, soft, or poorly supported fuel hose
- Evidence that a screw or other fastener may be contacting the tank
If gasoline is visible or the odor is strong, avoid operating electrical equipment that could create a spark, ventilate the area, and have the system inspected before using the boat.
Expert Marine Maintenance
From routine service to major repairs, our team of expert marine technicians handles it all. Full project management so you can enjoy your boat.

Expert Technicians
Certified marine specialists
A Major Refit Needs One Connected Plan
This repair crossed several specialties: fuel-system work, custom fabrication, interior disassembly, structural restoration, wiring, plumbing, and finish work. The value for the owner was not a list of individual tasks; it was having those pieces managed as one repair with a clear diagnosis and a finished outcome.
Mobile Marina documented the failure, coordinated the custom replacement, carried the repair through the opened structure, and returned the boat with the center fuel system renewed and the interior rebuilt around it.
If you have a suspected fuel-tank problem—or a larger repair that has stalled because it touches too many trades—request a maintenance estimate. We can inspect what is accessible, document the condition, and determine the right next step before the boat is opened up.
For related guidance, see our complete outboard maintenance schedule, review Mobile Marina's maintenance services, or explore Mobile Marina's vessel-management program.